

Calibration is the cheapest thing you can do on a spraying day, and the most commonly skipped. An uncalibrated sprayer does not announce itself — it just quietly over-doses one part of the field, under-doses another, and leaves you blaming the chemical.
Here is the whole process in seven steps. It takes about twenty minutes at the start of the season, and again whenever you change nozzles, pressure or speed.
Safety first, every time: calibrate with clean water only — never with chemical in the tank. Wear gloves and eye protection. Do the whole exercise before you mix anything.
Step 1 — Inspect every nozzle
Run the boom on clean water and walk its length. You are looking for a nozzle that dribbles, sprays crooked, or throws a visibly wider fan than its neighbours. All three mean the same thing: that nozzle is worn or partly blocked.
Nozzles are wear parts. As the orifice erodes it puts out progressively more liquid at the same pressure — so a worn nozzle is not just uneven, it is expensive. On a 21-nozzle boom, two worn nozzles can distort your whole application rate.
Clean blocked nozzles with a soft brush or compressed air. Never with wire — you will enlarge the orifice and make the problem permanent.
Step 2 — Set your working pressure and leave it there
Pick the pressure you intend to spray at and note it. Every number that follows is only valid at that pressure. Change the pressure later and the calibration is void.
The HTP triplex pump on the SAT-B501 holds pressure steadily because it has three plungers rather than one — but you still need to fix a working figure and stay on it.
Step 3 — Measure output from individual nozzles
With the boom running at working pressure, hold a measuring jug under one nozzle for exactly one minute and record what you collect. Repeat on several nozzles spread across the boom — one near each end and a few in the middle.
Now compare. If any nozzle is putting out noticeably more or less than the others, replace it. A good rule: when one nozzle differs from the average by more than about a tenth, it is time for a new one. If several are off, replace the whole set — they wear at similar rates, and a mixed set never sprays evenly.
Step 4 — Fix your forward speed, honestly
Speed matters as much as nozzle output, because the amount landing on a given area is output divided by how fast you cross it. Go twice as fast and you apply half as much.
Measure a known distance in the field — say 100 metres — and time how long the tractor takes to cover it in the gear and throttle setting you will actually spray in. Do it in the field, not on the road, and in similar ground conditions. Repeat it twice and use the average.
The mistake here is calibrating at one speed and then spraying faster because the day is running late. That single change undoes everything else you did.
Step 5 — Work out your effective swath
Your swath is the width the boom actually covers in one pass. On a 32 ft boom with evenly spaced nozzles, that is your 32 feet — provided you drive parallel passes without gapping or heavily overlapping.
This is worth being honest about. If you consistently overlap by a couple of feet, your real swath is narrower than the boom, and your true application rate is higher than you calculated.
Step 6 — Do the arithmetic
You now have three numbers: total output from the whole boom per minute, forward speed, and effective swath width. Together they give litres applied per unit area.
The practical form: multiply your swath width by the distance travelled in a minute to get the area covered per minute. Divide your total boom output per minute by that area, and you have your application rate.
Compare that against the rate the chemical label specifies. If they do not match, adjust one variable — usually speed, sometimes pressure or nozzle size — and measure again. Adjust one thing at a time, or you will not know which change did what.
Step 7 — Confirm with a clean-water tank run
Before mixing anything, fill the tank with a known volume of clean water and spray a measured area at your calibrated settings. Then check how much water you actually used against what your calculation predicted.
If the two agree, you are calibrated. If they do not, something in the earlier steps needs revisiting — almost always speed or a nozzle you did not check.
The seven calibration steps at a glance
| Step | What you do | What goes wrong |
|---|---|---|
| 1. Inspect every nozzle | Run the boom on clean water and walk its length | A nozzle that dribbles, sprays crooked or throws a wider fan is worn or blocked. Never clear one with wire — you enlarge the orifice permanently |
| 2. Set working pressure | Pick the pressure you will spray at and note it | Every number that follows is valid only at that pressure. Change it later and the calibration is void |
| 3. Measure nozzle output | Hold a jug under one nozzle for exactly one minute; repeat near each end and across the middle | Replace any nozzle differing from the average by more than about a tenth. If several are off, replace the whole set |
| 4. Fix forward speed | Time the tractor over a known distance — say 100 metres — in the gear and throttle you will actually spray in | Measure in the field, not on the road. Spraying faster later because the day is running late undoes everything else |
| 5. Work out effective swath | The width the boom actually covers in one pass — on a 32 ft boom, 32 feet | Only true if you drive parallel passes without gapping or heavily overlapping |
| 6. Do the arithmetic | Swath width × distance travelled per minute gives area per minute. Divide total boom output per minute by that area for your application rate | Compare against the chemical label. If it does not match, adjust one variable at a time — or you will not know which change did what |
| 7. Confirm with clean water | Spray a measured area from a known volume at your calibrated settings | If actual use disagrees with the prediction, revisit earlier steps — almost always speed, or a nozzle you did not check |
Calibrate with clean water only, never with chemical in the tank. Wear gloves and eye protection, and do the whole exercise before you mix anything.
Recalibrate when anything changes
- At the start of every spraying season, without exception
- Whenever you fit new or different nozzles
- When you change working pressure
- When you change tractor, gear or typical field speed
- Roughly midway through a heavy spraying season — nozzles wear faster than people expect
Two field habits worth more than the calculation
Spray when the wind is down — early morning or late afternoon. A perfectly calibrated sprayer still loses chemical to drift on a windy afternoon, and drift is money leaving your field with none of the benefit.
Keep a written record of your calibration figures on a card in the tractor. Next season you will start from a known baseline instead of guessing.
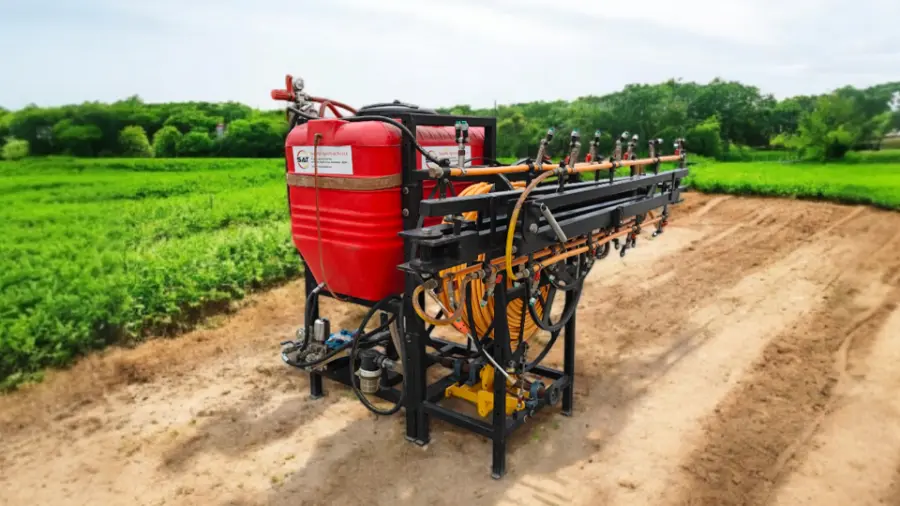
For the machine itself — 32 ft span, 21 nozzles, 500-litre tank and HTP triplex pump — see the SAT-B501 boom sprayer, or ask us which nozzle set suits your spray programme.